Deep Ultraviolet Imaging Using the Raspberry Pi HQ Camera
How to View Below 350nm?
The Raspberry Pi HQ camera has gotten into the hands of ultraviolet photographers and with a few modifications the camera has had surprisingly impressive results for UV.
Ultraviolet photography under 350nm (below what even birds/bees can see) is done using a specialized UV camera. On top of the camera itself, different arrangements of specialty lenses, filters, and UV lights are necessary depending on the application, driving the cost of these projects upwards.
Raspberry Pi has opened a low-cost window for camera hackers and enthusiasts by replacing the specialized UV camera with the Raspberry Pi HQ camera, shown in Figure 1. By removing the Color Filter Array (CFA) you are creating a sensitive enough sensor for photography and real-time video.
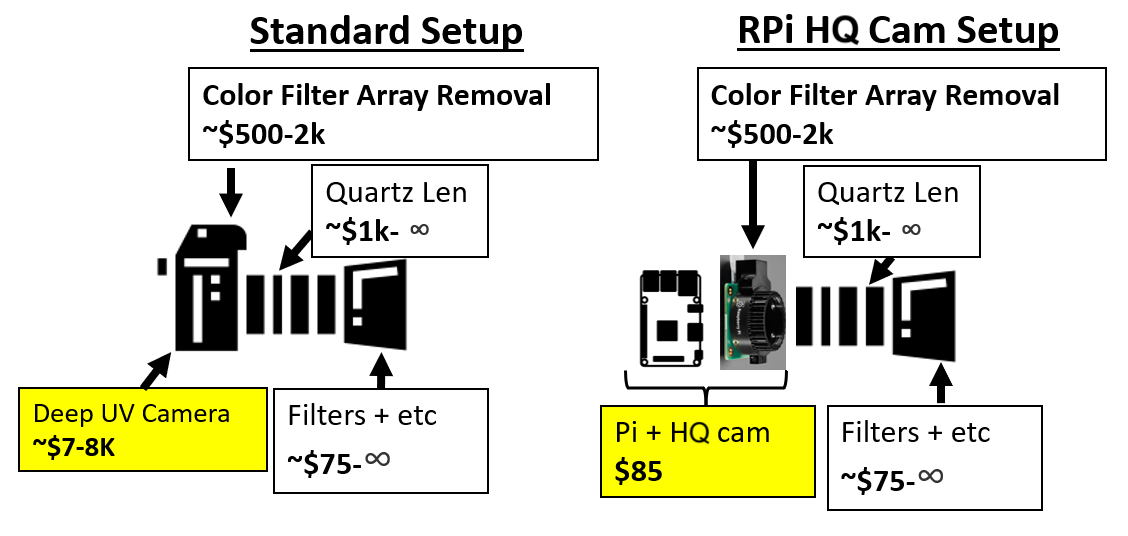
Figure 1. Deep UV photography. vs RaspberryPi + HQ cam
As you can tell the Pi configuration offsets the cost of only one of the components required but it is still a good start in the direction of low-cost ultraviolet photography.
What is it about the RPi HQ camera that made this possible from previous configurations?
The core of the camera is the Sony IMX477 sensor array with the 12.3 Megapixel RGB chip. After removing the CFA, here are the benefits making it optimal for UV video and photography:
- The HQ camera uses a low-cost Back Side Illuminated (BSI) sensor.
- The HQ camera has a C/CS lens mount, compatible with most professional photography setups.
- Raspberry Pi driver allows for still images with configurable ISO and exposure time.
- Raspberry Pi driver can get you the RAW image files.
When hacking a RGB camera for deep UV photography purposes, how well the sensor array will respond to UV light is a wildcard, since the characteristics of those wavelengths are usually unspecified. However, the 400nm blue response on the IMX477 gave a glimpse of hope that it was worth a try (see Figure 2). And try they did, between a collaboration of Dan from Maxmax.com and “Da Bateman” from ultravioletphotography.com; results were good, see Figure 3.
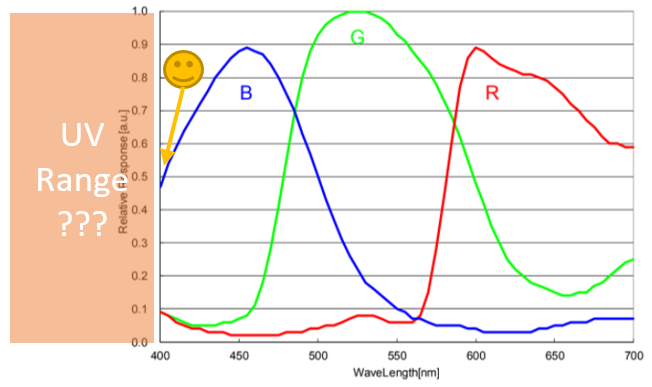
Figure 2. Edited, Spectral sensitivity characteristics of Sony IMX477 from datasheet.
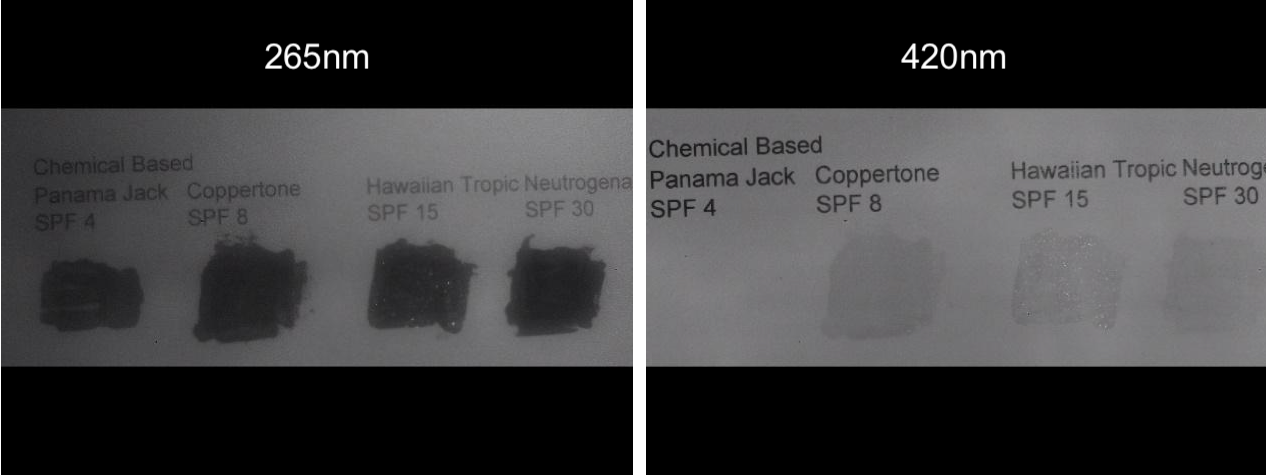
Figure 3. Sunscreen samples under deep UV vs visible. Photo Courtesy of MaxMax.com
UV Video
While the main reason “Da Bateman” and Dan started exploring the HQ cam was for deep UV photography, another door had opened into UV video. With a scrappy DIY setup, the results were impressive:
Finally, a link to the UV world in real-time on a RPi: a gateway into portable, OpenCV, cloud-based UV applications.
Here is a comment from Dan Llewellyn:
"Raspberry Pi can take RAW+JPG pictures so you have access to RAW data and you have a fair bit of control over the camera (versus a typical USB camera with data is coming in a compressed format where you don't have direct control and data analysis capability is limited.
I have taken pictures as low a 255nm and have no doubt the camera can quite a bit lower.
In summary, that Raspberry Pi HQ camera is, by far, the least expensive way to image below 350nm. Even with a color DSLR modified for UV-VIS-IR, UV pictures can be taken to a point but with long exposures and mediocre results. And the UV capable DSLR lens, like the Jenoptik 60mm APO costs $7,000 and the 105mm UV Nikkor copies cost over $8,000."
What’s next:
The applications for this I will leave to the reader's imagination, but we are excited to try the StereoPi v2 with our setup. We hope to take UV into real-time, IoT, robotics, drone, and AI applications. The StereoPi are low-hanging fruit to start.
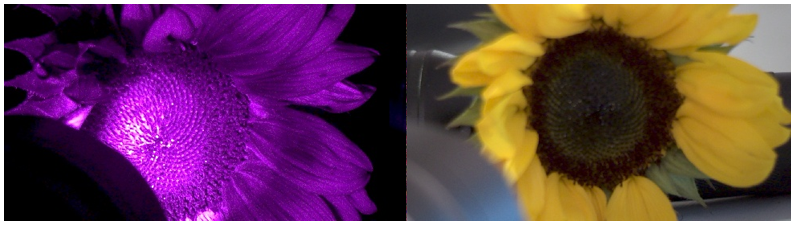
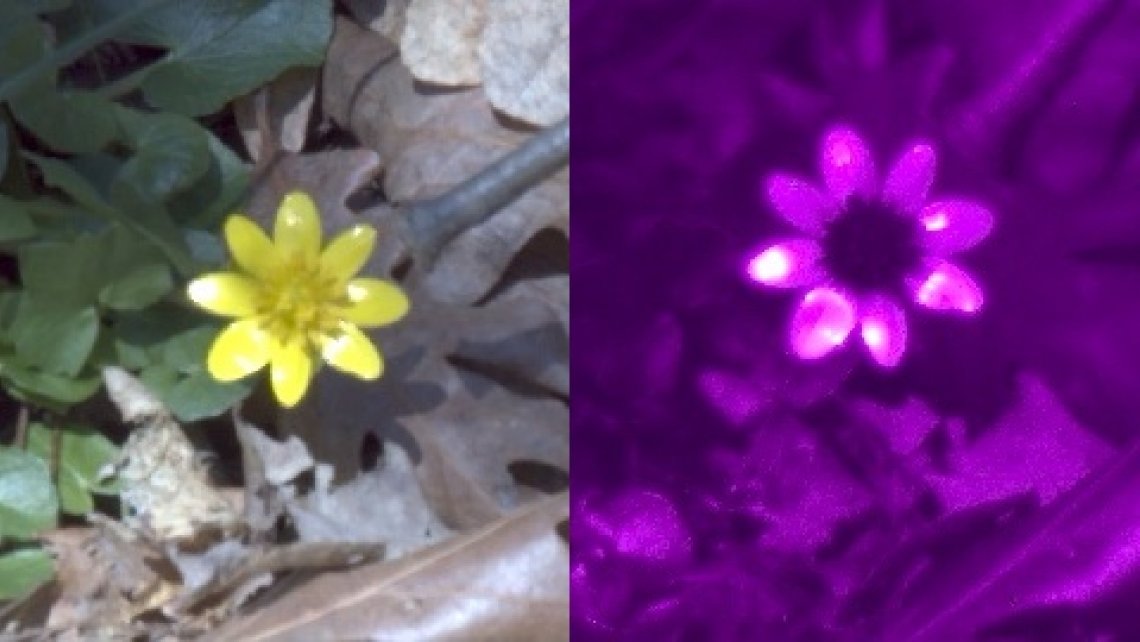
Figure 4. Stereo imaging of flowers using modified Raspberry Pi HQ camera and regular. Notice the pigment change on the inside vs outside of the petals in the UV image. UV source is a UV flashlight.
Fun details:
Back Side Illuminated (BSI) sensor
One issue within UV photography is whether the image sensor is Front Side Illuminated (FSI) or Back Side Illuminated (BSI). With an FSI sensor, the light must pass through the metal wiring layer to get to the photodiode. The shorter UV wavelengths have a harder time getting through the wiring with FSI, as opposed to BSI. Sony IMX477 on the Raspberry Pi HQ camera is BSI.

Image courtesy ot MaxMax.com
Working Outside
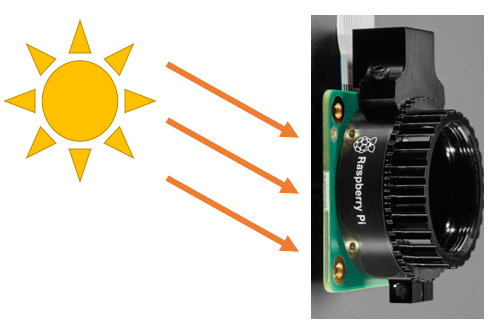
For outside use, sunlight hitting the back of the HQ camera distorts the image.
StereoPi team wants to thanks all authors for this article!
Valentin Siderskiy and Aaron Lozhkin
Sources and Acknowledgements:
www.ultravioletphotography.com, Link 1, Link 2
https://maxmax.com, UV HQ camera Link
Great thanks to:
“Da Bateman” from ultravioletphotography.com
“Andrea B.” from ultravioletphotography.com
Dan Llewellyn from maxmax.com
And collaborator Aaron Kiesser
Funding:
This letter was made possible in part to the academic research done at NJIT from the support of Dr. Alex Zhou.