Stitching 360 panorama with Raspberry Pi CM3, StereoPi and two fisheye cameras. Step-by-step guide.
In this article we will continue our experiments with the StereoPi stereoscopic camera based on the Raspberry Pi Compute Module. This time, we will create a 360 degree panoramic photo!
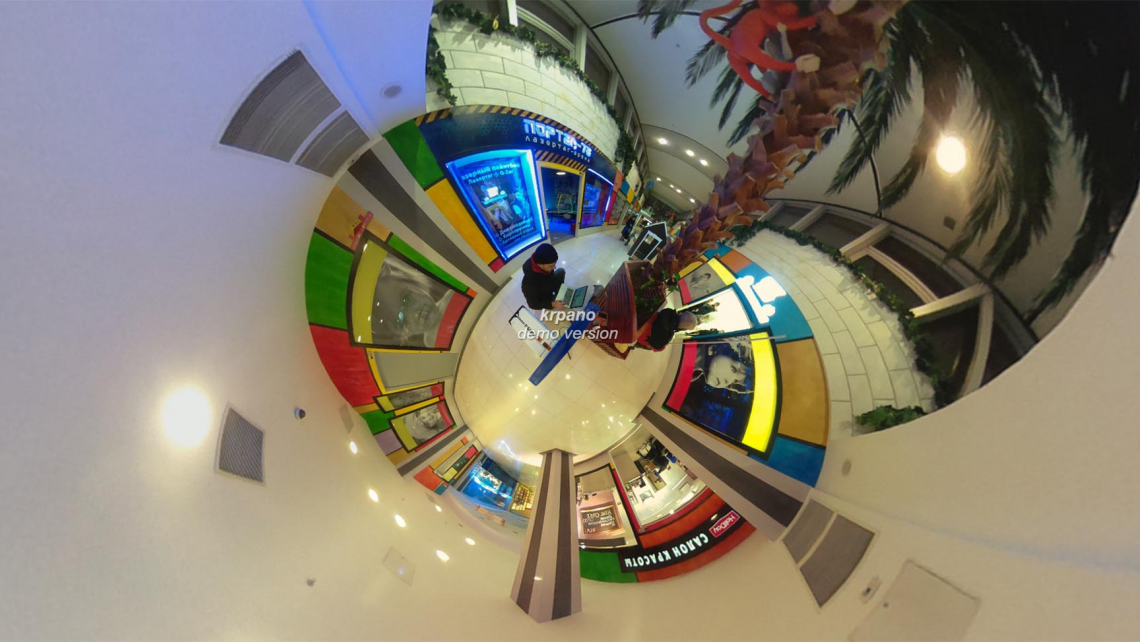
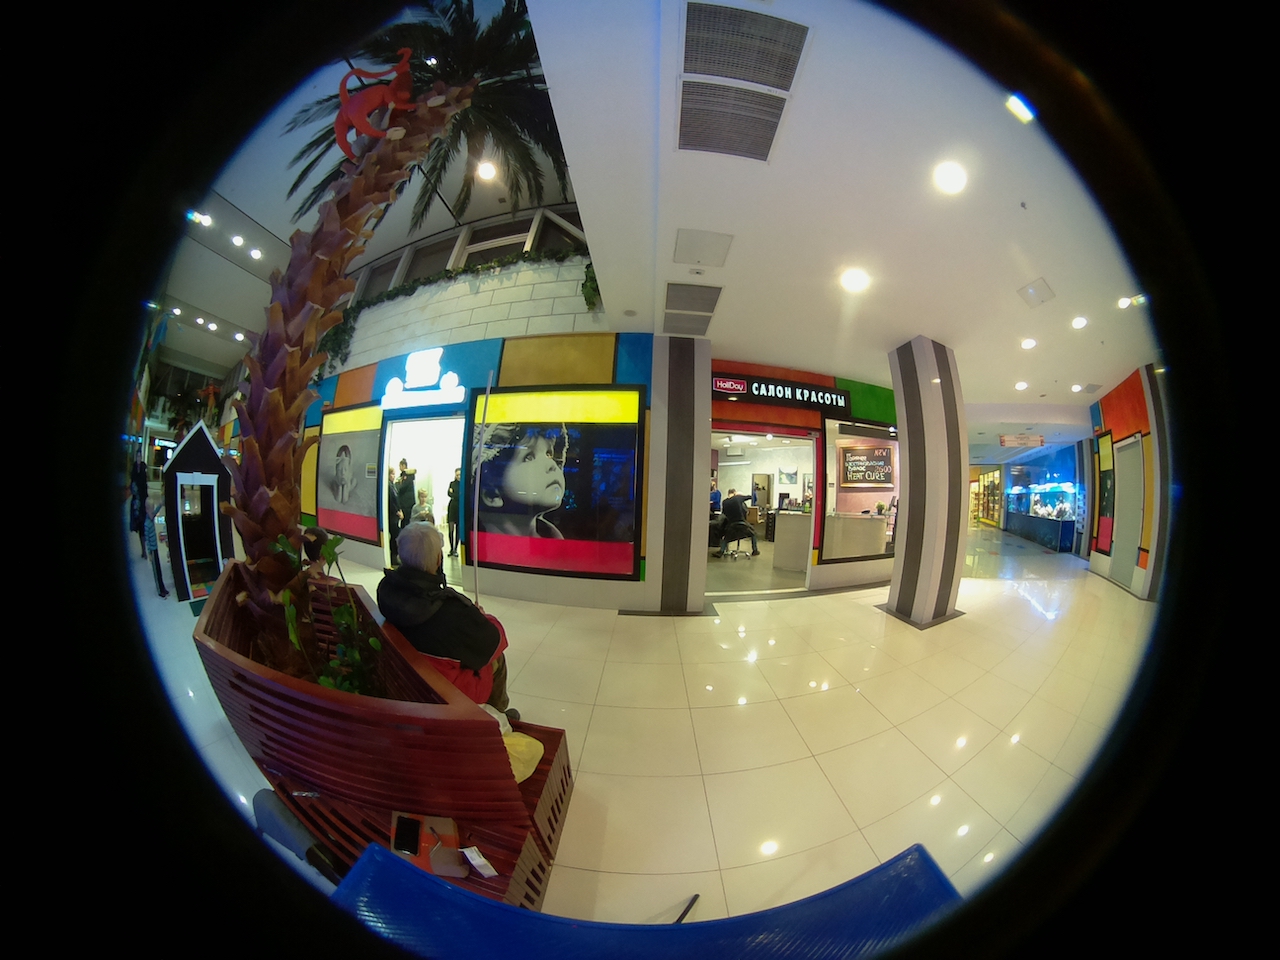
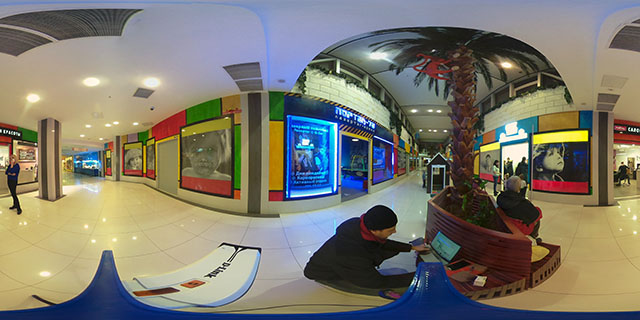
Click on image for online panorama view
Intro
In our last experiments, we installed cameras side-by-side with parallel axes and worked with stereoscopic effect. Today, we will use an inverted approach: cameras pointed in opposite directions, but equipped with wide-angle fisheye optics, each with a 200 degree field of view.
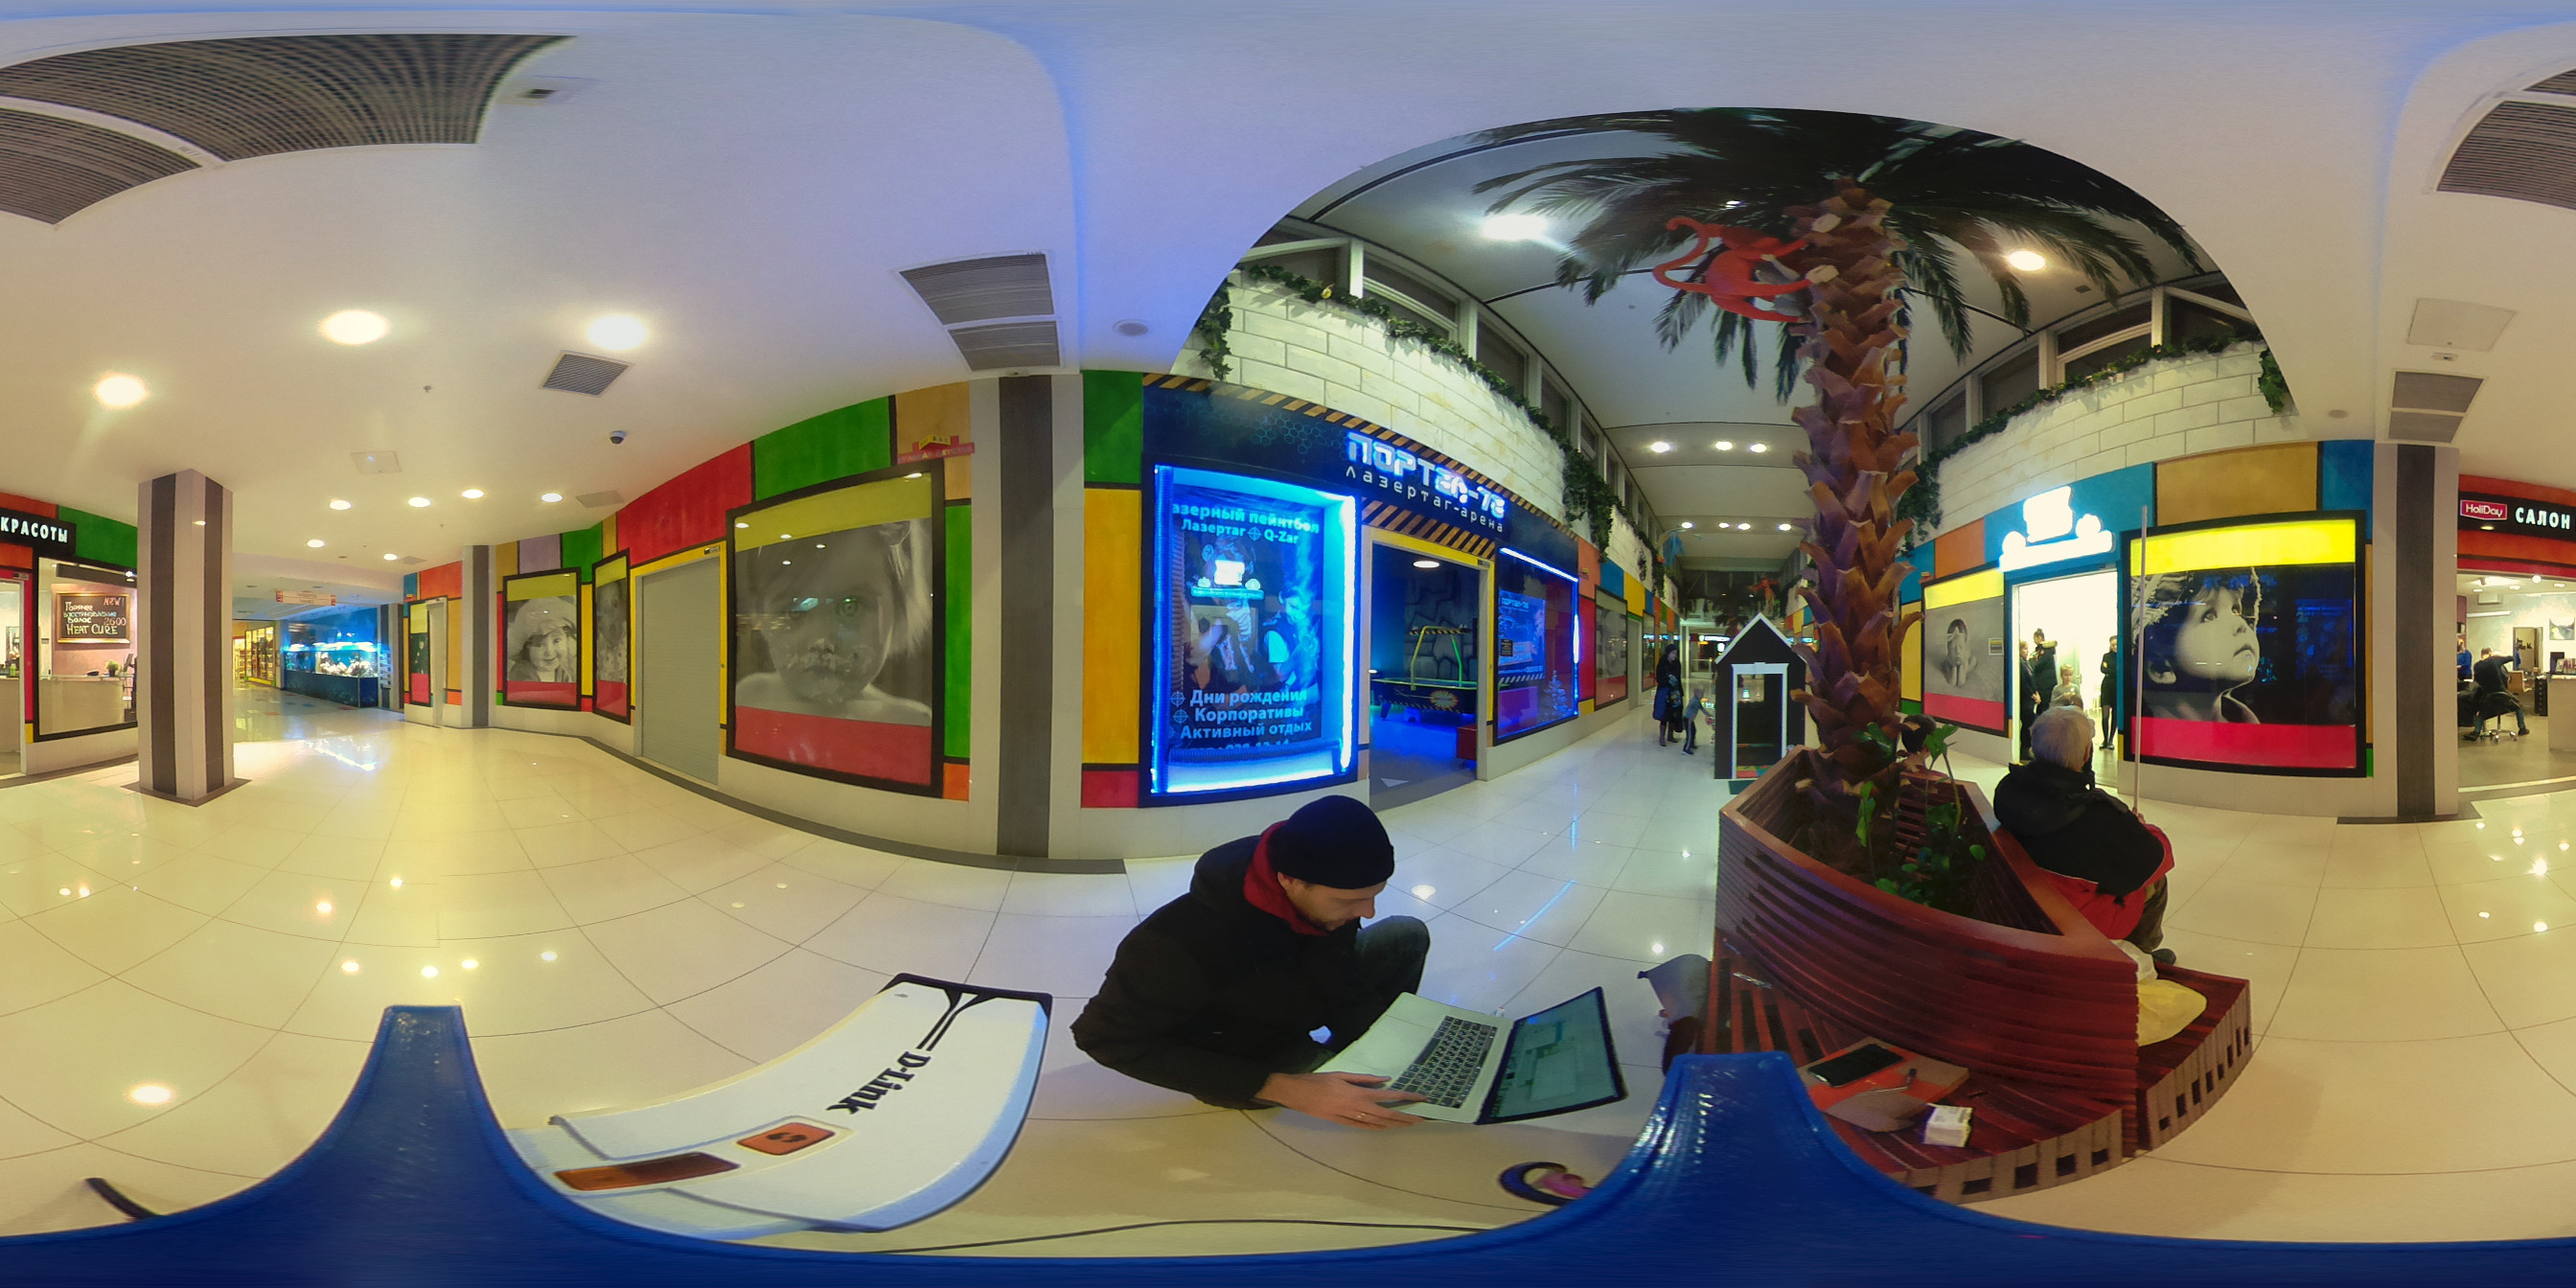
Let’s start at the end: here’s our resulting creation — basically, a panorama.
Hardware
We have a StereoPi board…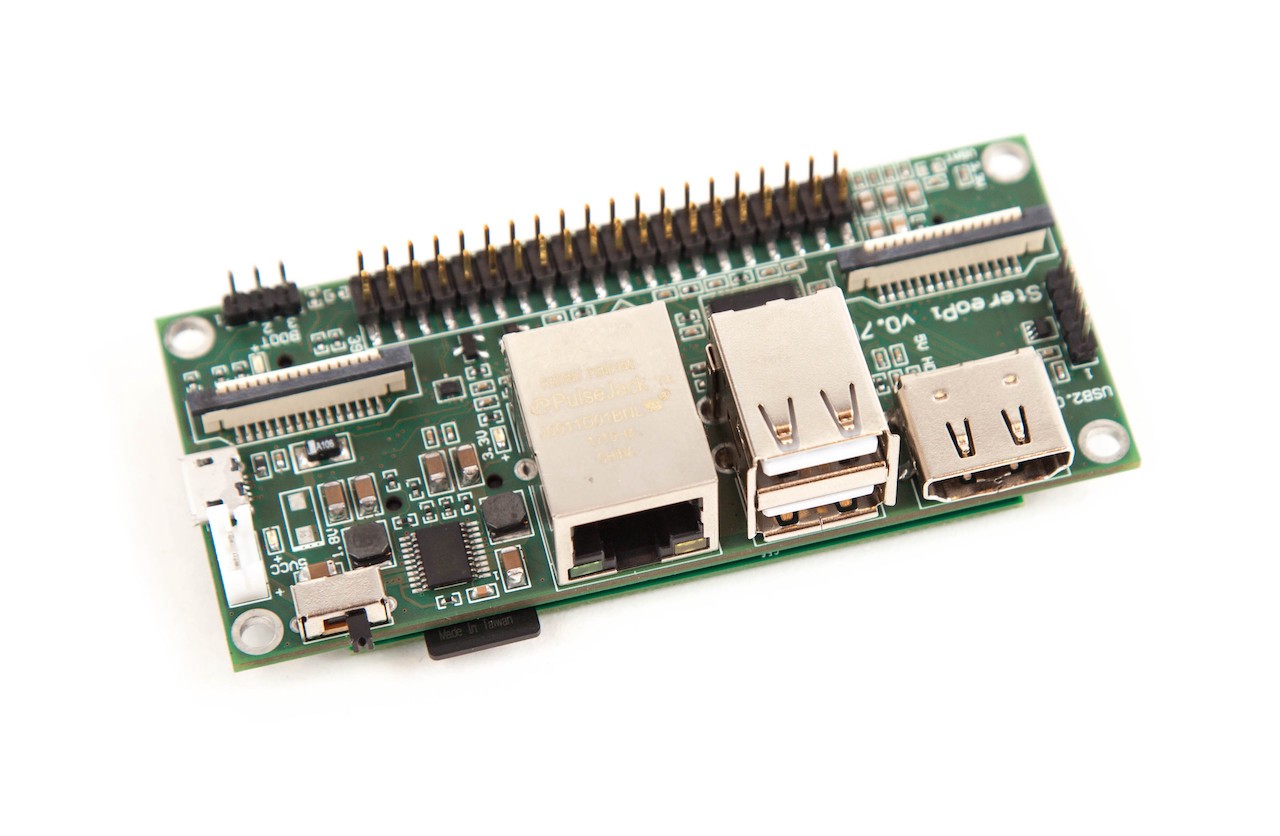
…with Raspberry Pi Compute Module 3 Lite inside…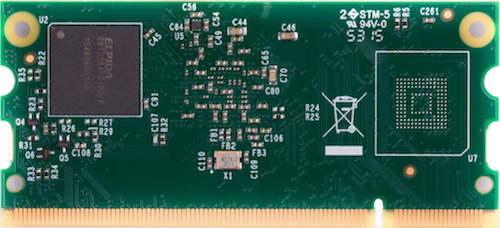
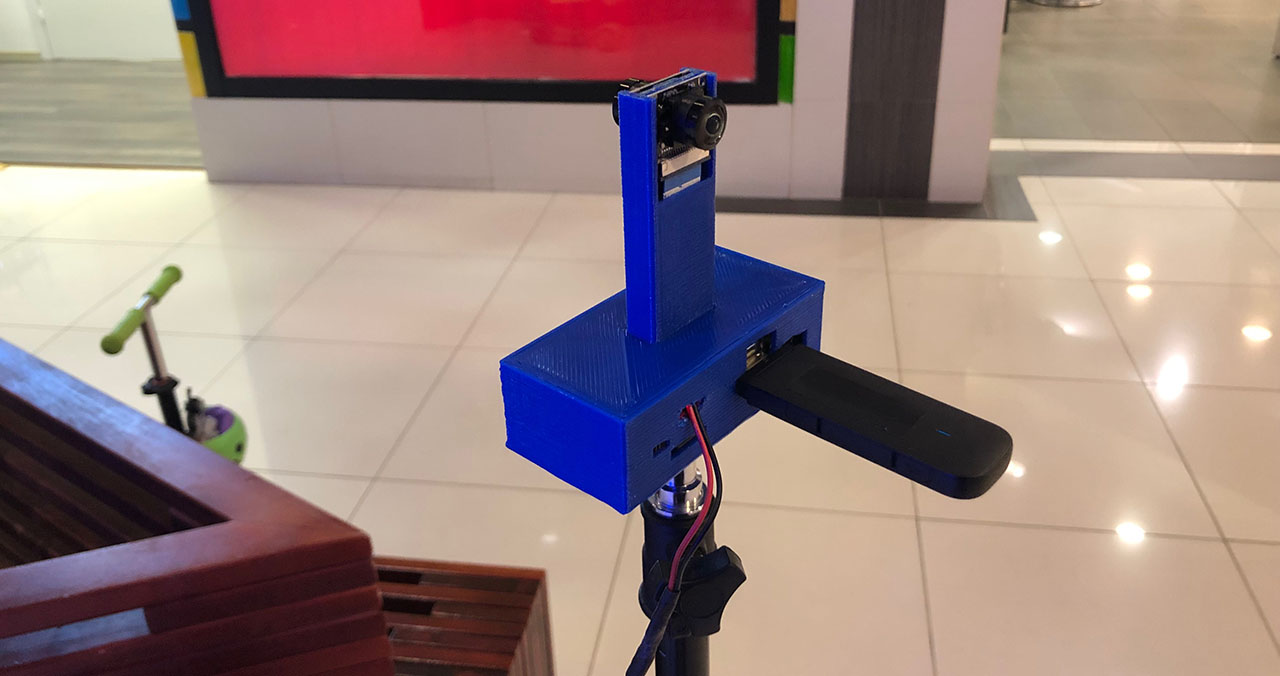
…and two wide-angle RPi (M) WaveShare cameras:
We then attach the cameras back-to-back:
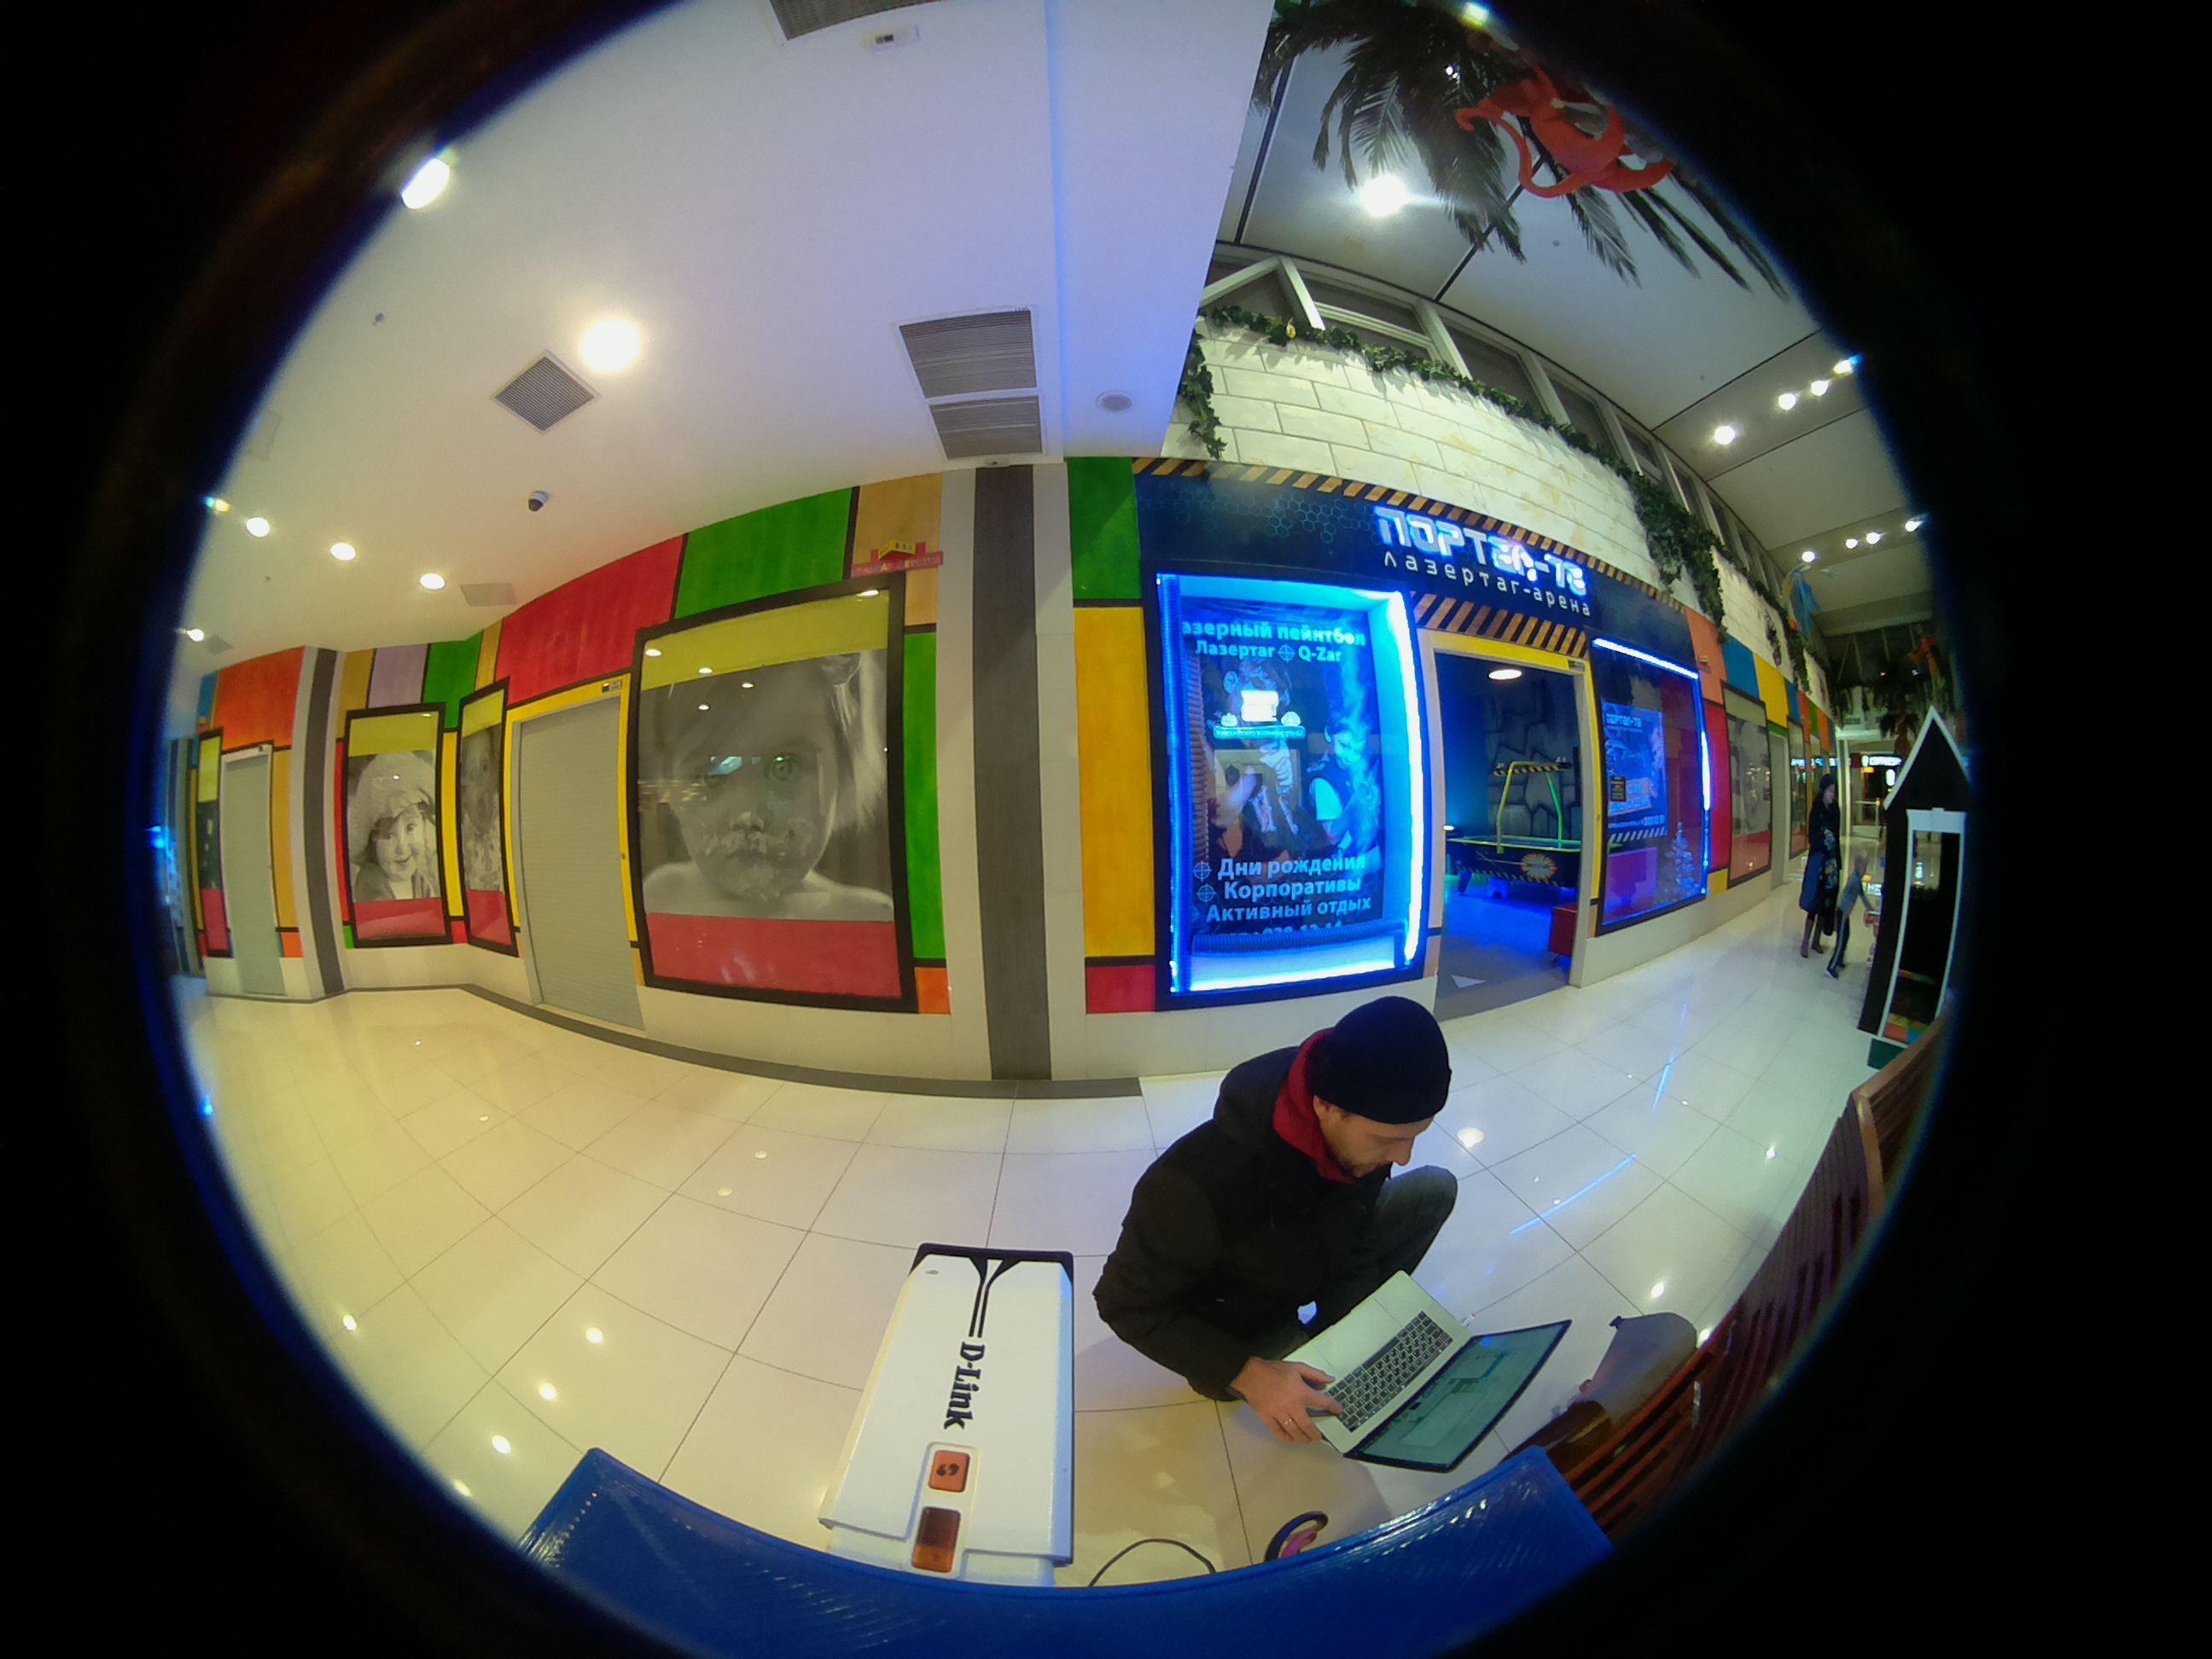
Then, we capture a photo with each camera, and get these two pictures using raspistill:
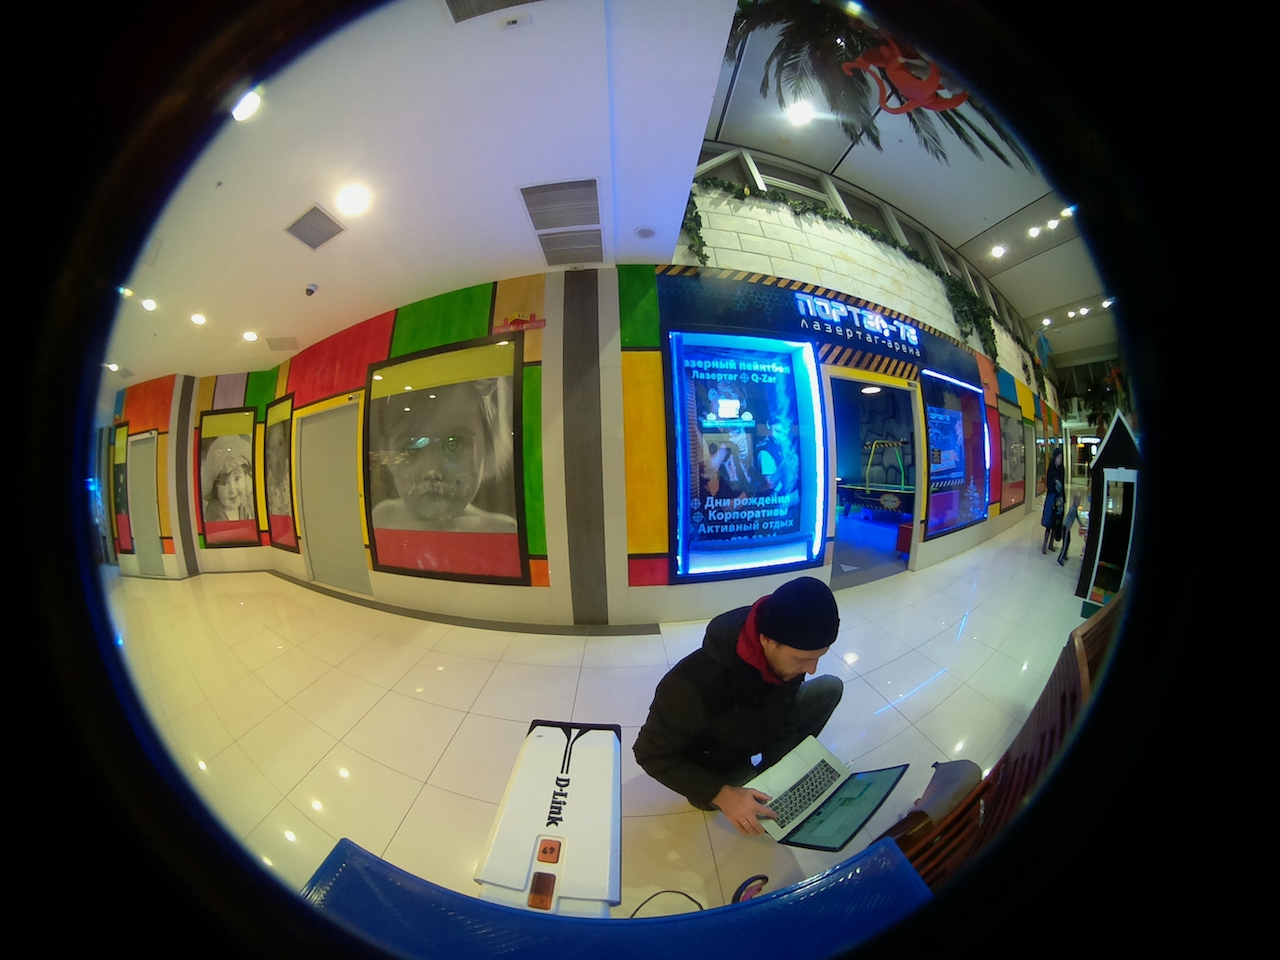
Full size version
Panorama stitching
Here, a question arose: how could we combine these two images into one with an equirectangular projection, such as is supported by almost all panorama viewing software?
After a long investigation, we found a 360-camera project, which was used as a reference for our future code.
However, to start stitching, we would have to start with a desktop panoramic application, to prepare a template for future transformations. For this, we used Hugin, which is open-source and can be downloaded here: http://hugin.sourceforge.net/download/
1. So, we’ve downloaded, set up, and started up the software.
2. Now, we need to choose “Simple” in the “Interface” menu.
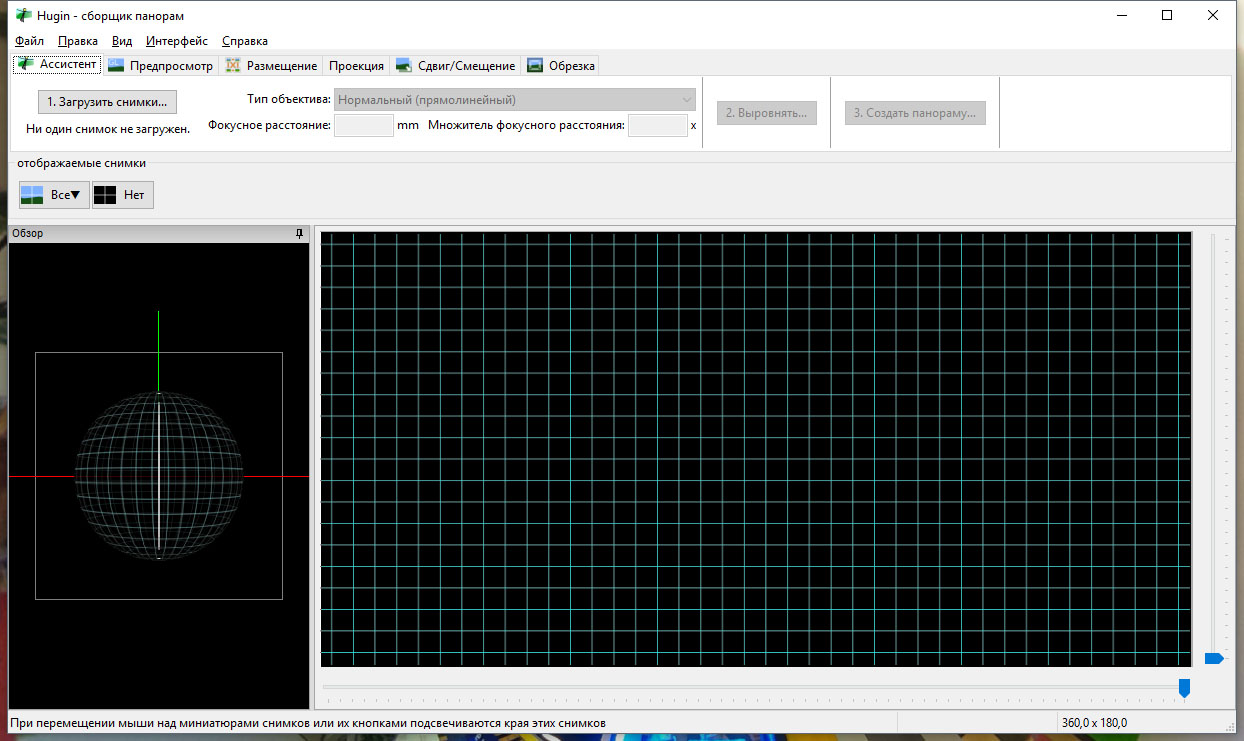
3. Press “Load images…” and add two our files (21.jpg и 21–2.jpg).
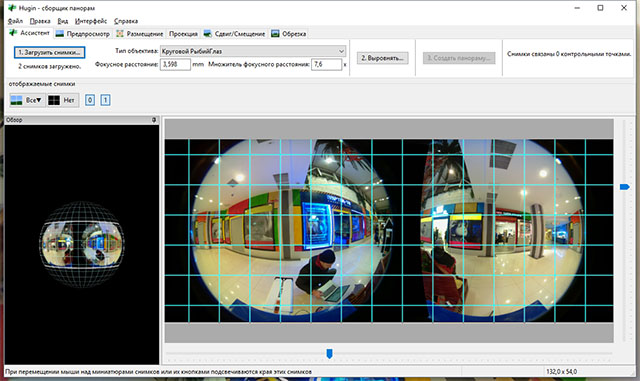
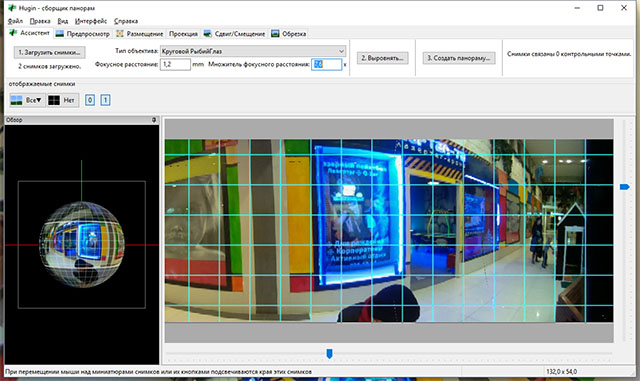
4. Set “Lens type” to “Circular Fisheye”. “Focal Length” should be set to 1,2 mm, and “Focal length multiplier” to 7,6x. In the “Projection” tab, check that “Field of view” is set to 360x180 and “Equirectangular”. These are the default settings.
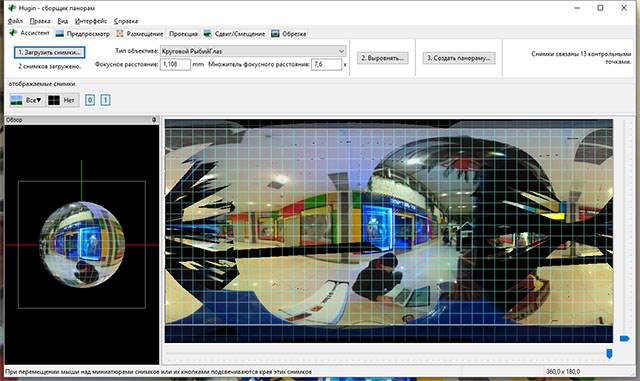
5. Next, press the button “2. Align…”. This begins the search for control points, which should find around 10–13 points. At this step, our panorama is already starting to look like a panorama.
6. And now for the most important step — saving the project for later use in the automatic stitching of all consecutive panoramas captured by our 2 fisheye cameras. To save, go to“File” -> “Save as…” -> filename “stereopi-template.pto”
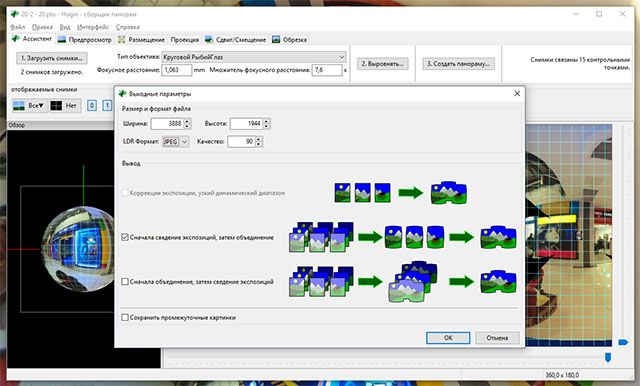
7. Then, we go back to the “Assistant” tab (if we happened to go out of it) and press “3. Create panorama”. A new window appears, in which we set a height of 1944, to which the width adjusts automatically. The LDR format (resulting picture format) should then be set to JPEG. The image quality is at your discretion; the default for this is 90. This time around, we don’t tinker with“Corrections” and instead press “Save”.
8. After this, several windows appear, one of which will show the progress log.
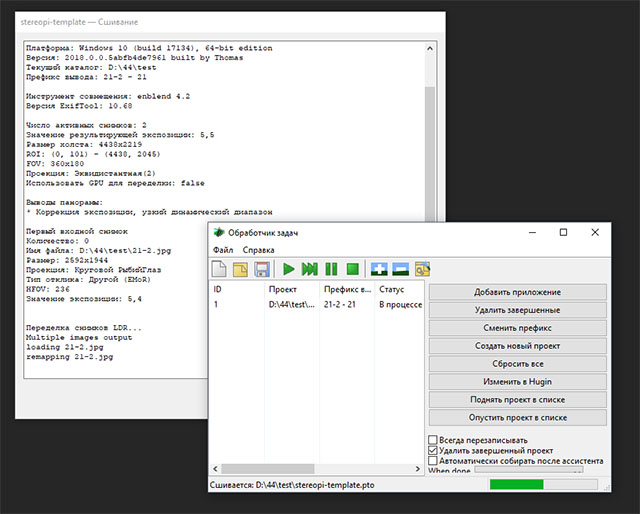
9. In the end, we get something that looks like this:

Full size version
This is exactly what we needed- an equirectangular projection of our spherical panorama!
Porting stitching onboard
Ok, so all of this is great- but do we really want to bother with each captured photo?
To up our efficiency, we need to make this process automatic. For this, we will need to use our project file, saved at step 6. We take this file (in our case it’s called stereopi-template.pto) and copy it over to StereoPi.
We also copy our script, stereopi-stich.sh. This script needs us to input parameters — namely, the file names of the fisheye photos to be stitched to equirectangular projection.
But first, we need to install all the required software for StereoPi. Simply download this script on StereoPi and run it: installer.sh
Now let’s run the stitching script:# ./stereopi-stich.sh 21.jpg 21–2.jpg
Stiching files 21.jpg and 21–2.jpg
Generating pto file…
Reading /opt/Pano/test1/21–2.jpg…
Reading /opt/Pano/test1/21.jpg…
Assigned 1 lenses.
Written output to /opt/Pano/test1/tmp/project.pto
Written output to ./tmp/project.pto
number of cmdline args: 1
==================================
Stitching panorama
==================================
nona -z LZW -r ldr -m TIFF_m -o 21_21–2-pano -i 0 ./tmp/project.pto
nona -z LZW -r ldr -m TIFF_m -o 21_21–2-pano -i 1 ./tmp/project.pto
checkpto — generate-argfile= project.pto_21_21–2-pano.arg
./tmp/project.pto
enblend — compression=90 -w -f2688x1344 -o 21_21–2-pano.jpg — 21_21–2-pano0000.tif 21_21–2-pano0001.tif
enblend: info: loading next image: 21_21–2-pano0000.tif 1/1
enblend: info: loading next image: 21_21–2-pano0001.tif 1/1
enblend: info: writing final output
Bogus input colorspace
exiftool -overwrite_original_in_place -TagsFromFile
/opt/Pano/test1/21–2.jpg -WhitePoint -ColorSpace -@ /usr/share/hugin/data/hugin_exiftool_copy.arg -@ project.pto_21_21–
2-pano.arg 21_21–2-pano.jpg
1 image files updated
==================================
Remove temporary files
==================================
rm project.pto_21_21–2-pano.arg 21_21–2-pano0000.tif 21_21–2-
pano0001.tif
The process takes about 50 seconds. It’d be good to look for some optimizations for it in the future, but right now it’s good enough for testing purposes
This file is the result:
Full size version
Voila! We’ve automatically stitched two fisheye images into one equirectangular file! Now, we can use this script for stitching all future files. The key point is to avoid changing relative camera positions — otherwise, the stitching will be of lower quality.
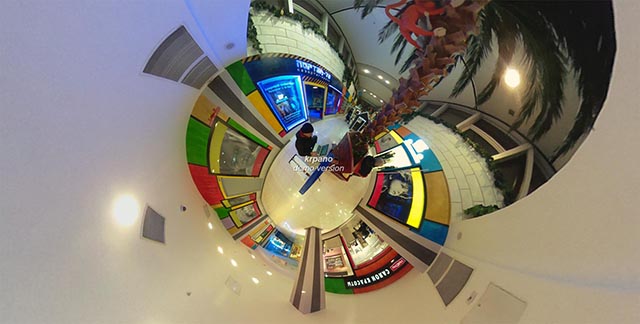
Now, we just need to insert it somewhere on our web-page. A panorama player is required to view the panorama..
We think the best embedding player for panoramas is KRPano. It supports both photos and videos. However, a paid license is required for usage. We bought a license about 5 years ago, but at that time it was based on Adobe Flash, and didn’t support HTML5. Now it can, so we plan to buy new license. https://krpano.com/
You can download my archive with all you need to obtain this result. The funniest view mode is “Little planet” (to change the view mode, just click the right mouse button).
We hope that our experiment will not only be interesting for you, but will also be useful as a step-by-step manual. Thank you for your attention!
Useful links: